为现有Spring MVC项目添加OAuth

问题描述

将Spring-Rest-API-Using-Spring-Security-Oauth2-Example的三个package:config, filter,分别放到现有的Detection-Server项目下(新建三个package),和AuthTokenInfo.java文件放到com.taveen.bean下。运行后报错:
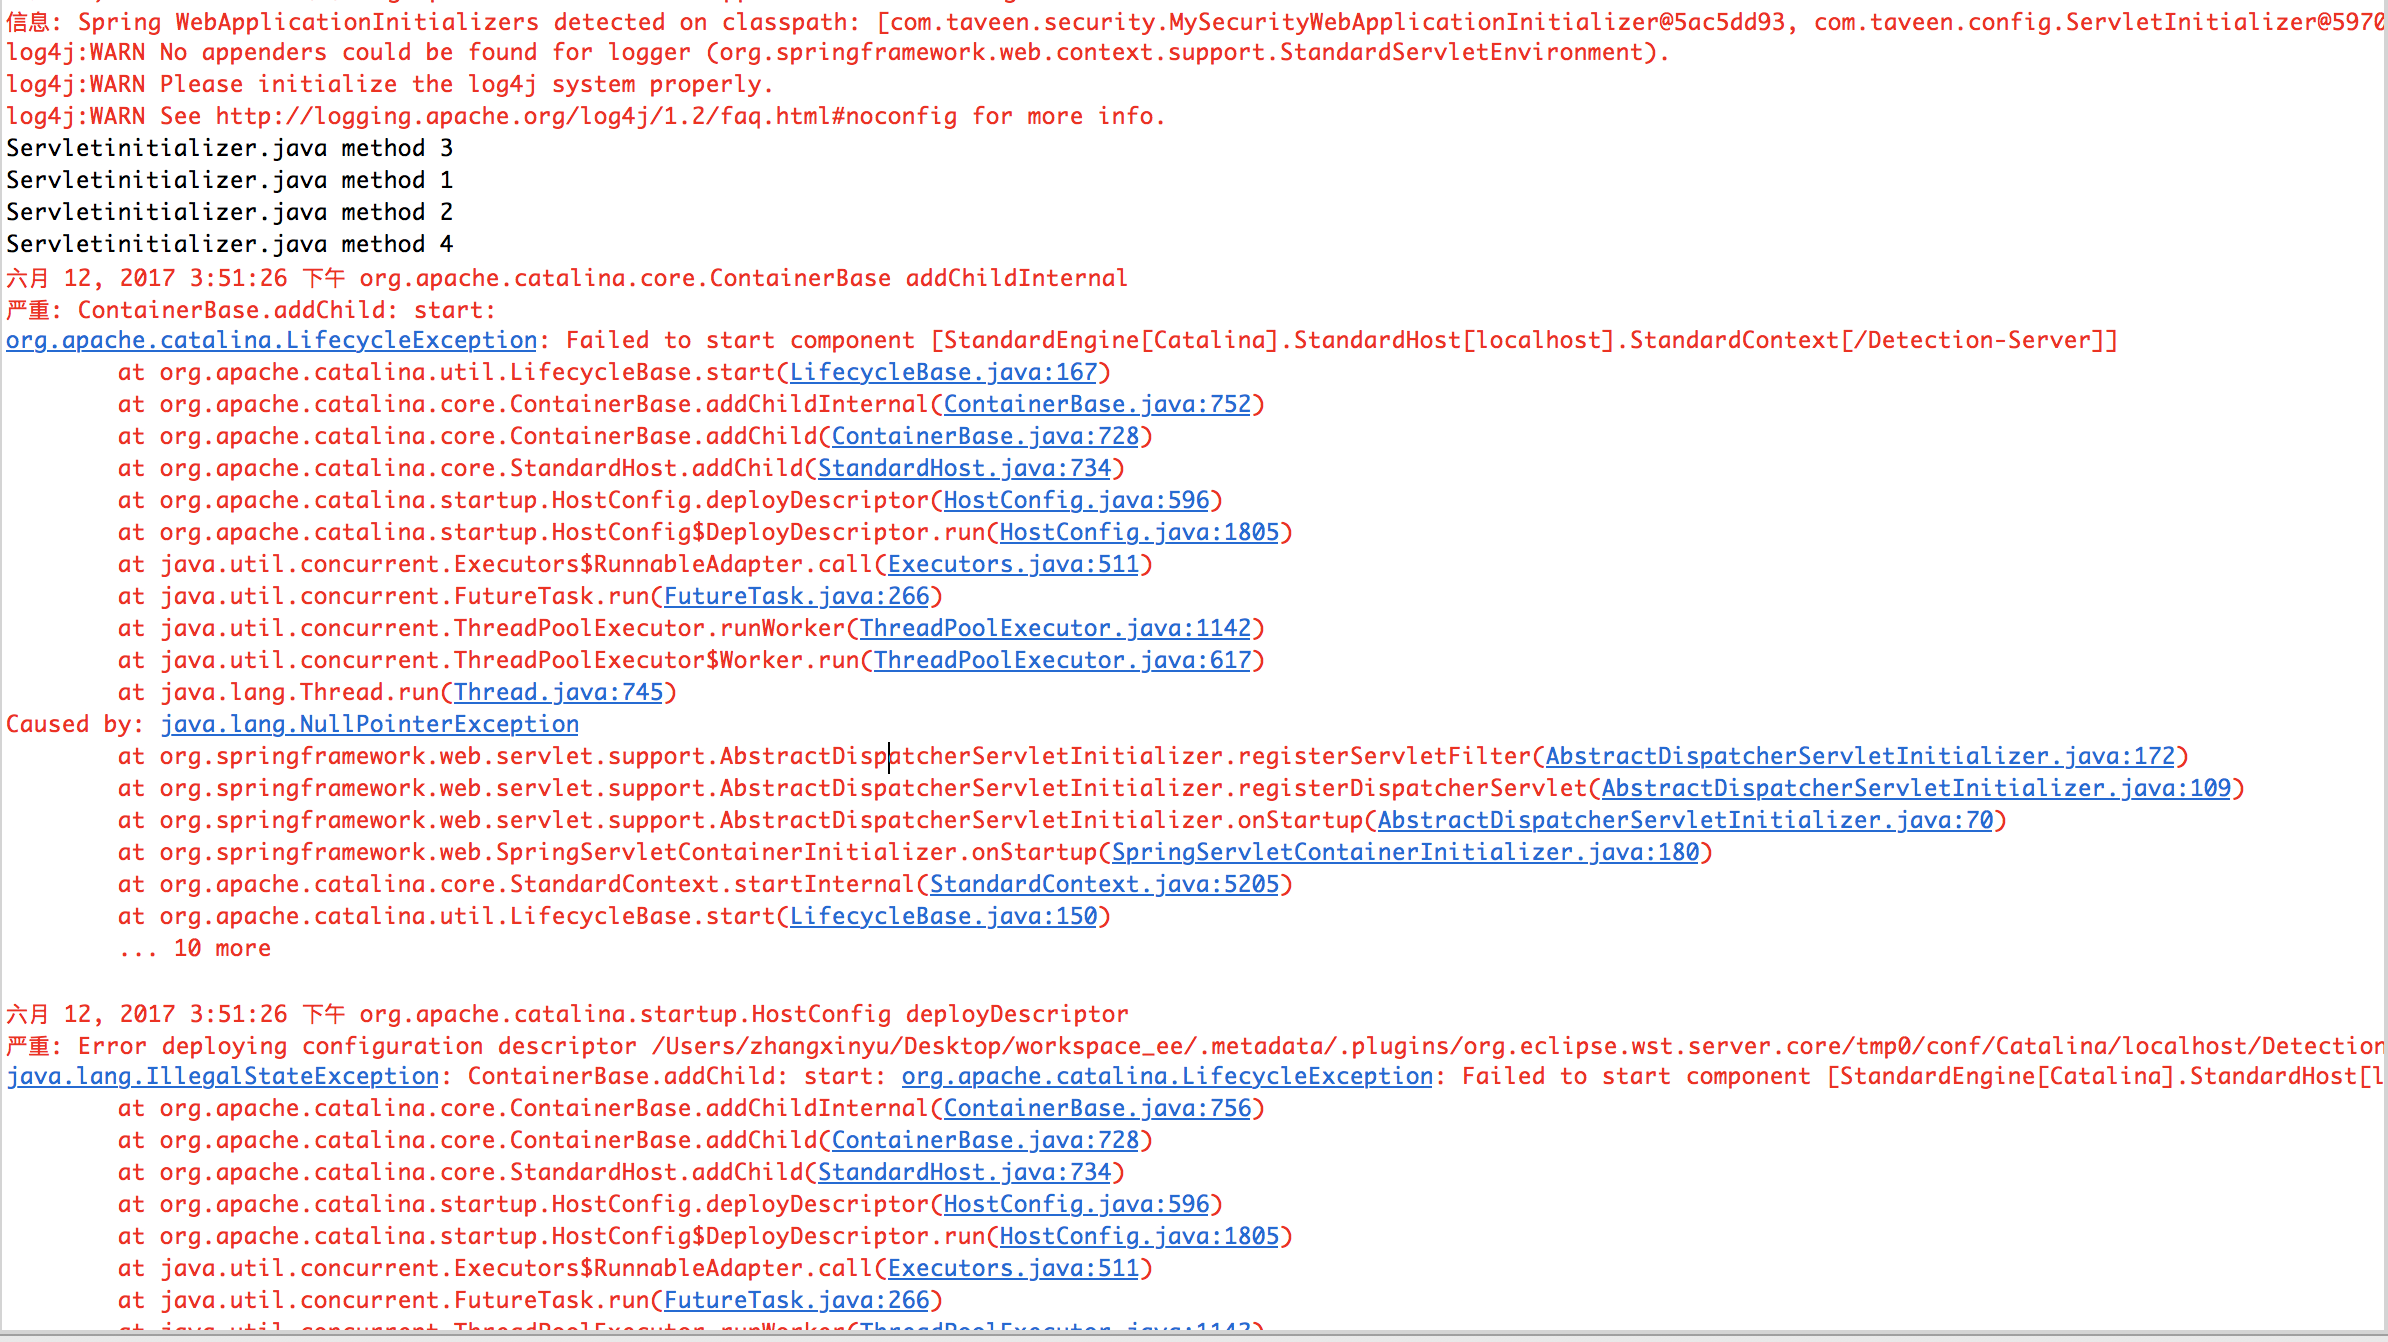
Alt text

经大师兄指点,报错的关键信息在于:
Spring WebApplicationInitializers detected on classpath: [com.taveen.security.MySecurityWebApplicationInitializer@Sac5d…, com.taveen.config.ServletInitializer@5970…]
意思是项目的初始化配置文件冲突了。需要删除重复的java配置文件(com.taveen.config下的),然后完全通过添加xml配置文件即可将OAuth2集成到现有的Spring MVC项目中。

思路

Spring中添加OAuth2 可能只需要为项目添加配置即可,这个配置可以通过写java代码(上述方式)或配置xml文件。上面的报错是因为,示例项目的package config中的文件(初始化配置项目用)和现有项目中的xml初始化配置冲突了。打算用xml配置的形式(security.xml)添加OAuth2. 然后将这个配置文件security.xml引用到web.xml中。

参考文章

google关键字: spring xml configuration
网上找到的Spring + OAuth2项目代码配置都是类似的,相应地配置xml即可。

java版
xml版

二者实现的功能是基本相同的,是OAuth2的两种配置方式。xml版中使用数据库来存储token, java版直接使用in memory的形式存储。

我的测试结果是:
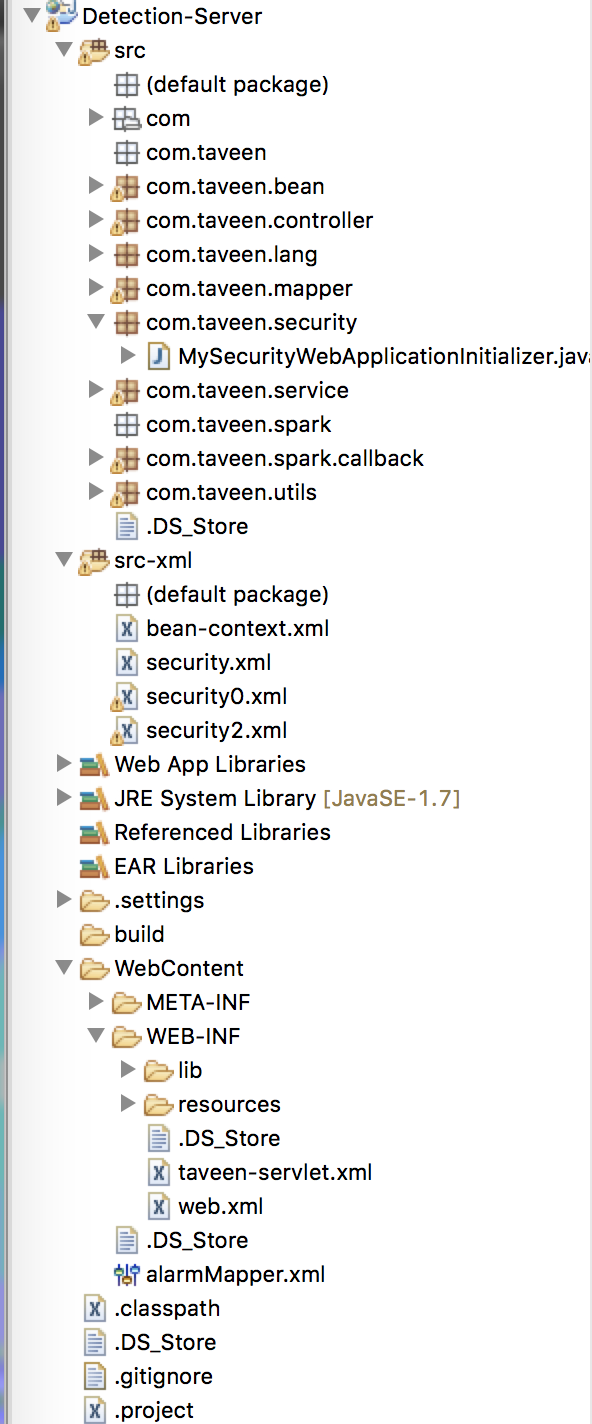
除了com.taveen.security下的MySecurityWebApplicationInitializer.java需保留以外,其他额外添加的java文件都可以删掉,然后加上security.xml的配置,并引入到web.xml中即可。

项目的目录结构

Alt text

主要配置

web.xml中引入,图中多个security.xml我是为了测试用的,引用一个就行):

1
2
3
4
5
6
7
<context-param>
<param-name>contextConfigLocation</param-name>
<param-value>
classpath:bean-context.xml,
classpath:security.xml
</param-value>
</context-param>

security.xml中的关键代码

1、配置用于客户端POST请求token时填写的username和password,还需要填写的grant_type在下面2中配置:

1
2
3
4
5
6
7
<authentication-manager alias="authenticationManager" xmlns="http://www.springframework.org/schema/security">
<authentication-provider>
<user-service id="userDetailsService">
<user name="xinyu" password="zhang" authorities="ROLE_OAUTH_CLIENT" />
</user-service>
</authentication-provider>
</authentication-manager>

2、配置客户端的set authorization中填写的username和password和POST请求token所需的grant_type(一般用password):

1
2
3
4
5
6
7
8
9
10
11
<oauth:client-details-service id="clientDetails">
<!-- no secret -->
<oauth:client client-id="my-trusted-client" authorized-grant-types="password,authorization_code,refresh_token,implicit"
authorities="ROLE_CLIENT, ROLE_TRUSTED_CLIENT" scope="read,write,trust" access-token-validity="60" />
<!-- has secret -->
<oauth:client client-id="my-trusted-client-with-secret" authorized-grant-types="password,authorization_code,refresh_token,implicit"
secret="somesecret" authorities="ROLE_CLIENT, ROLE_TRUSTED_CLIENT" scope="read,write,trust" access-token-validity="600" />
<!--different scope + client_credentials -->
<oauth:client client-id="my-client-with-secret" authorized-grant-types="client_credentials" authorities="ROLE_CLIENT"
scope="read" secret="secret" />
</oauth:client-details-service>

3、拦截接口设置:

1
2
3
4
5
6
7
8
9
<!-- The OAuth2 protected resources are separated out into their own block so we can deal with authorization and error handling
separately. This isn't mandatory, but it makes it easier to control the behaviour. -->
<http pattern="/detection/**" create-session="never" entry-point-ref="oauthAuthenticationEntryPoint"
access-decision-manager-ref="accessDecisionManager" xmlns="http://www.springframework.org/schema/security">
<anonymous enabled="false" />
<intercept-url pattern="/detection/**" access="ROLE_OAUTH_CLIENT" />
<custom-filter ref="resourceServerFilter" before="PRE_AUTH_FILTER" />
<access-denied-handler ref="oauthAccessDeniedHandler" />
</http>

4、token存储方式:

可以像security.xml那样存在内存里:

1
2
<!-- Used for the persistenceof tokens (currently an in memory implementation) -->
<bean id="tokenStore" class="org.springframework.security.oauth2.provider.token.store.InMemoryTokenStore" />

也可以是像security2.xml(详情见xml版配置文章)那样存在数据库中(JDBC):

1
2
3
4
5
6
7
8
9
10
11
12
13
<!--We have used JDBC tokenstore to store the tokens, we can use In Memory token store for development purpose -->
<bean id="tokenStore"
class="org.springframework.security.oauth2.provider.token.store.JdbcTokenStore">
<constructor-arg ref="jdbcTemplate" />
</bean>
<bean id="jdbcTemplate"
class="org.springframework.jdbc.datasource.DriverManagerDataSource">
<property name="driverClassName" value="com.mysql.jdbc.Driver"/>
<property name="url" value="jdbc:mysql://10.108.101.210:3306/db_detection"/>
<property name="username" value="root"/>
<property name="password" value="123456"/>
</bean>

实现效果演示

1、客户端选用DHC Restlet Client。set authorization配置如下(意思是访问这个接口需要验证有效token才可以):
Alt text

2、如果没有带着有效的access_token去请求接口,会返回401:
Alt text

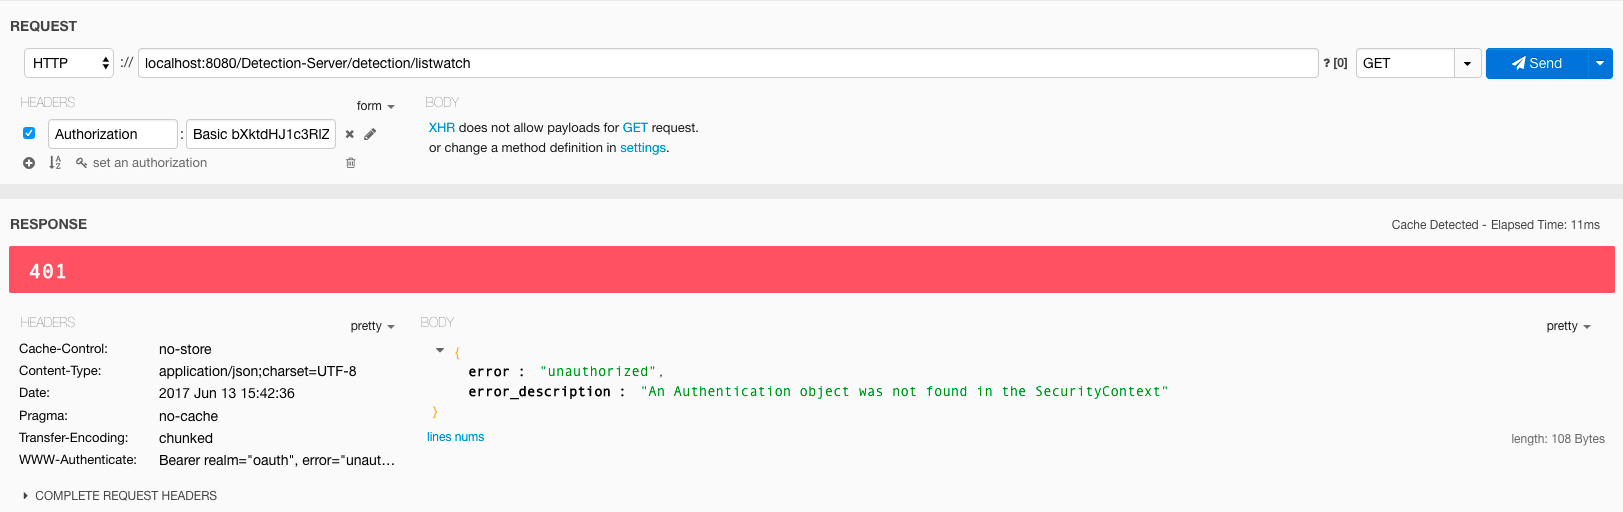
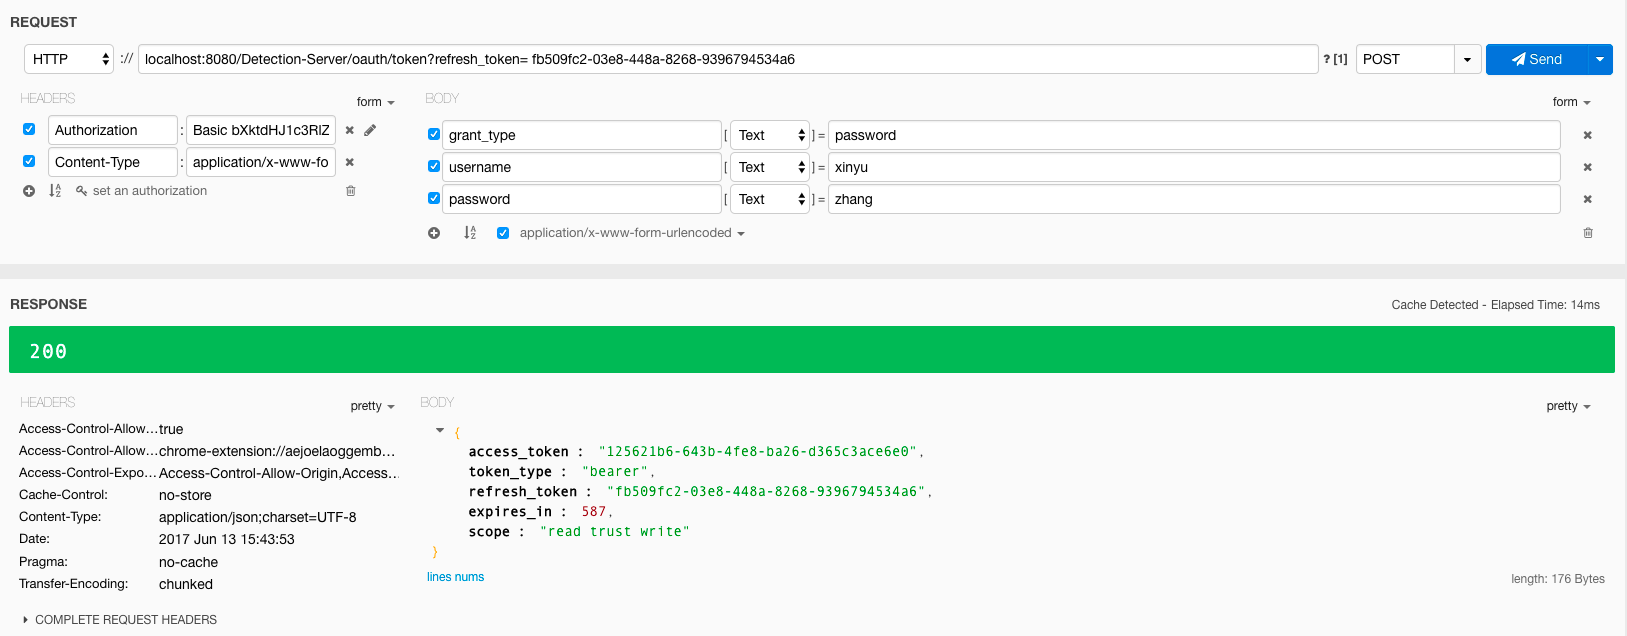
3、请求token。要访问的接口为localhost:8080/Detection-Server/detection/......
请求token的URL为:localhost:8080/Detection-Server/oauth/token。请求method为POST.
携带的数据以及成功返回的token如下:

Alt text

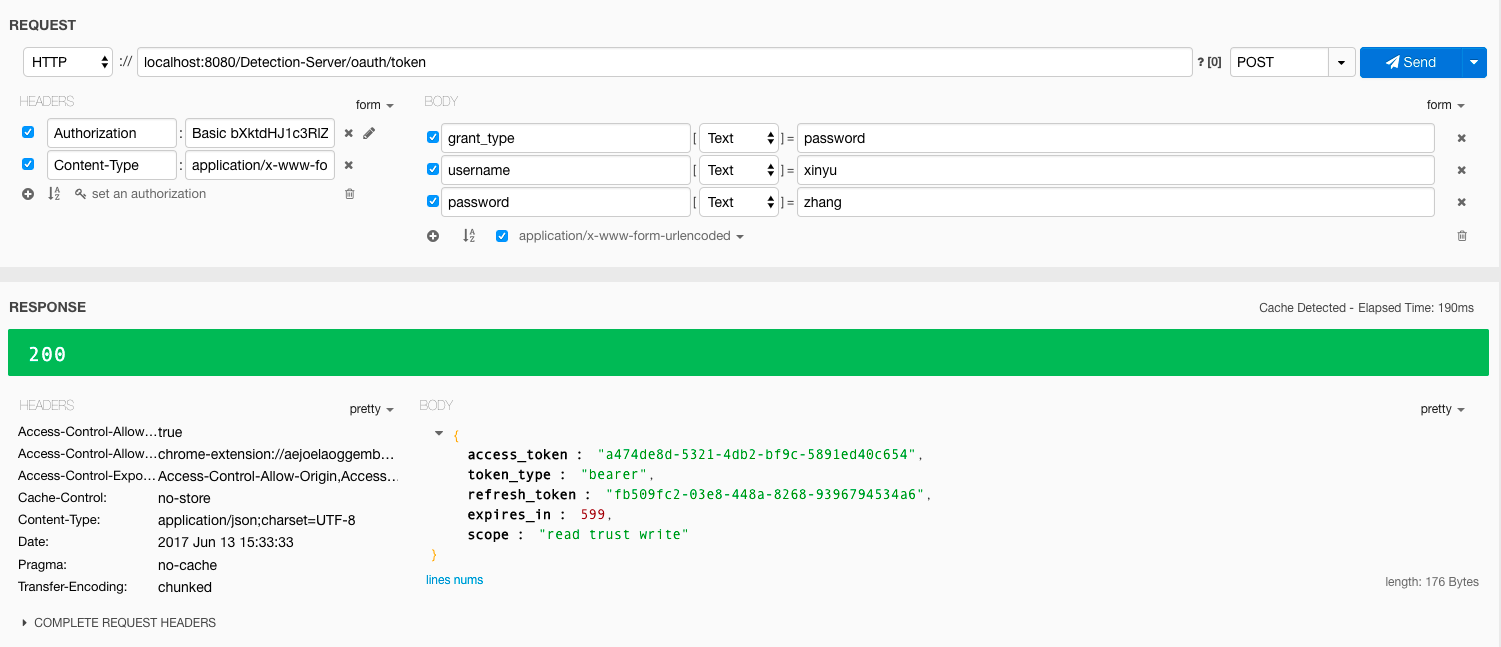
由于设置的该token有效期为10min,10min中内再次请求token(带着refresh_token请求)仍会得到这一对access_token和refresh_token,只有expires_in会减少(减到0就过期了)。所以应保存获取的access_token和refresh_token:

4、带着access_token去请求接口数据(注意这里的URL变了:/Detection-Server/detection/...):

/detection/listwatch
Alt text

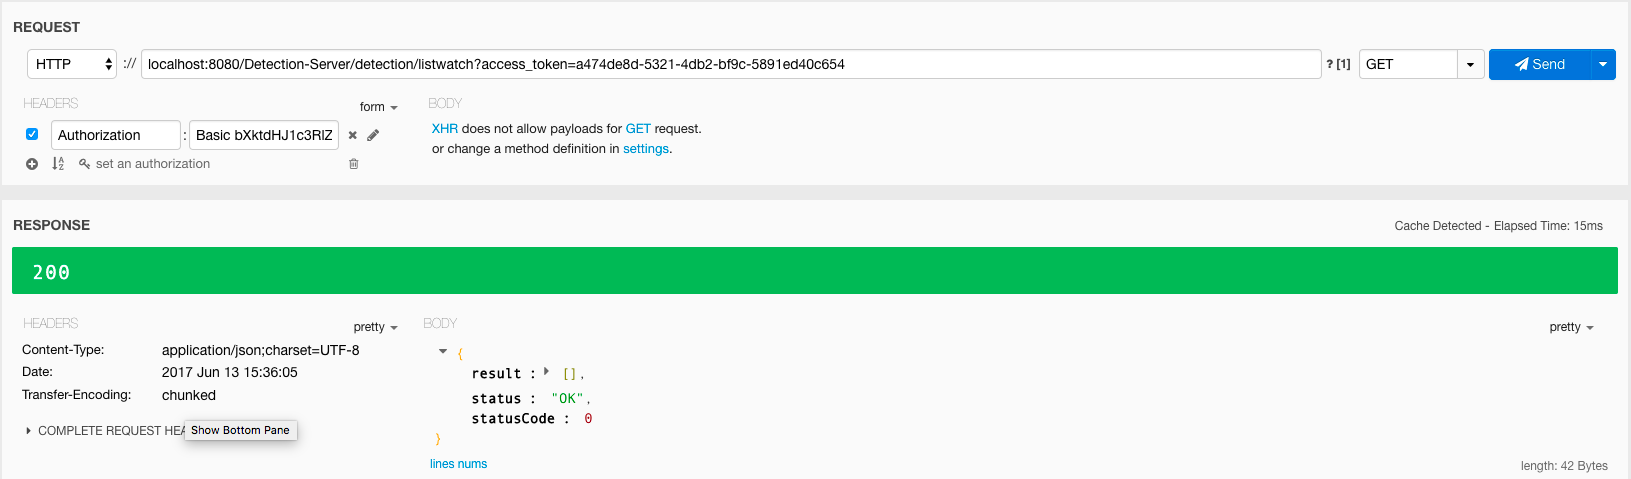
/detection/listallclues?p=1
Alt text

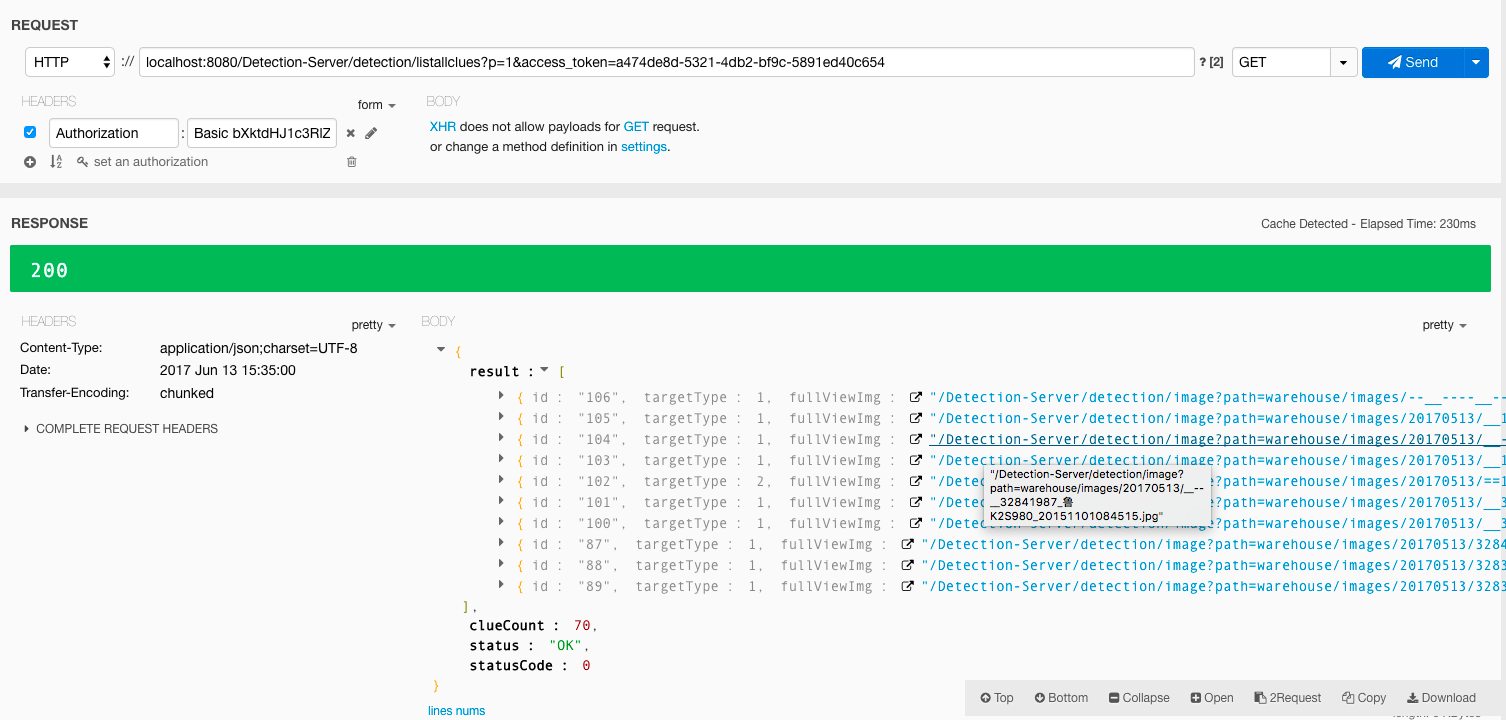
/detection/runningtasks
Alt text

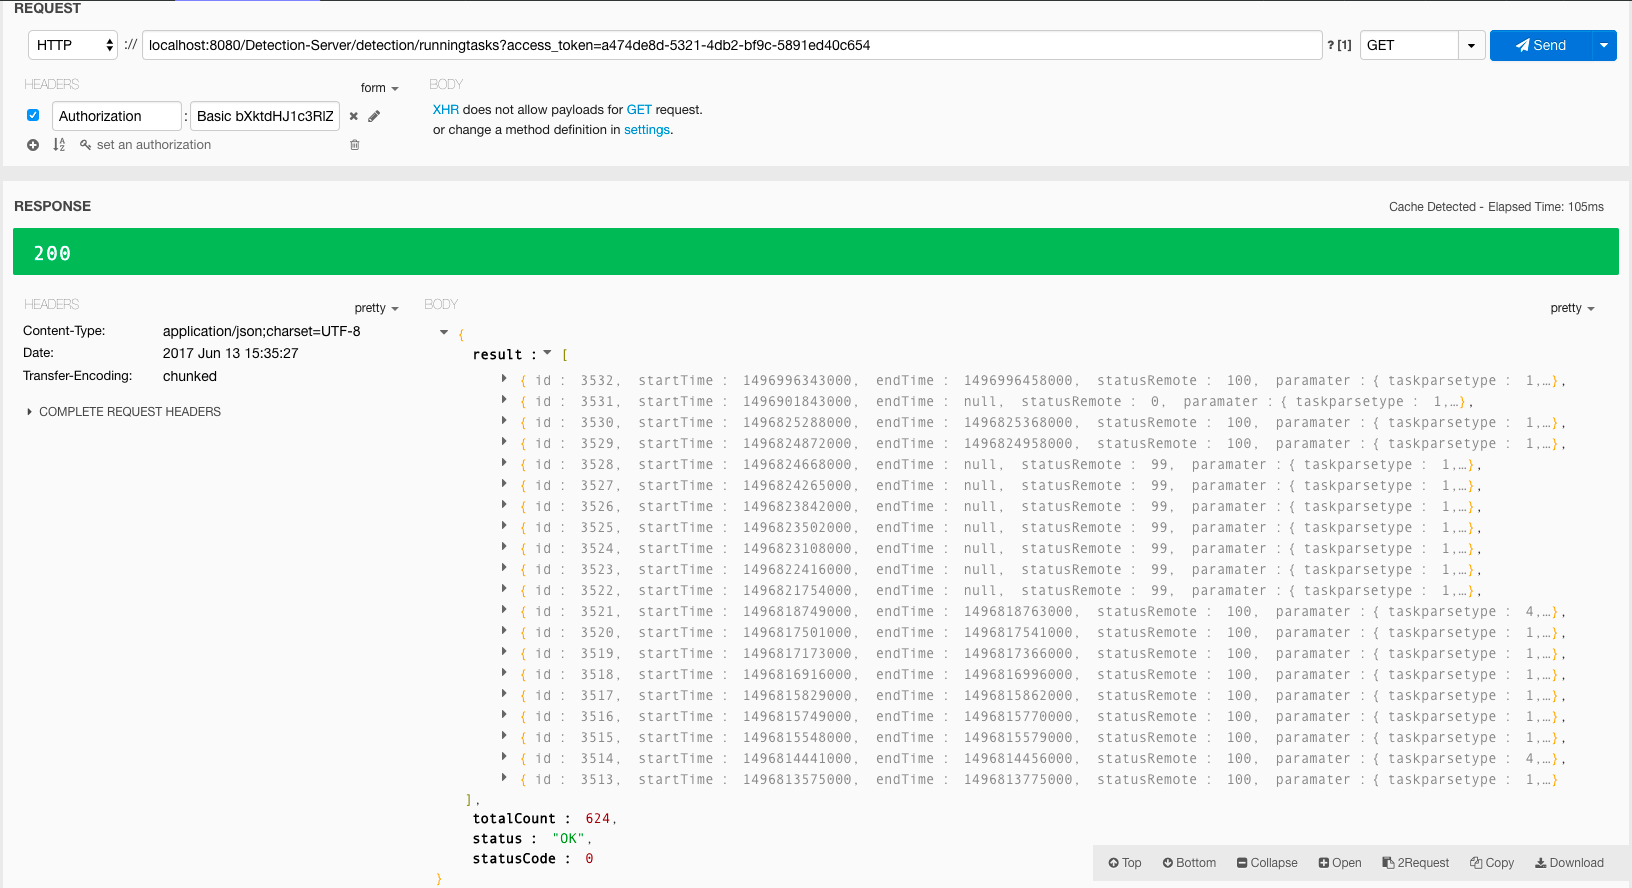
5、带着refresh_token去请求新的access_token:
如果上一个请求的access_token尚未过期,则仍会返回这一对:
Alt text

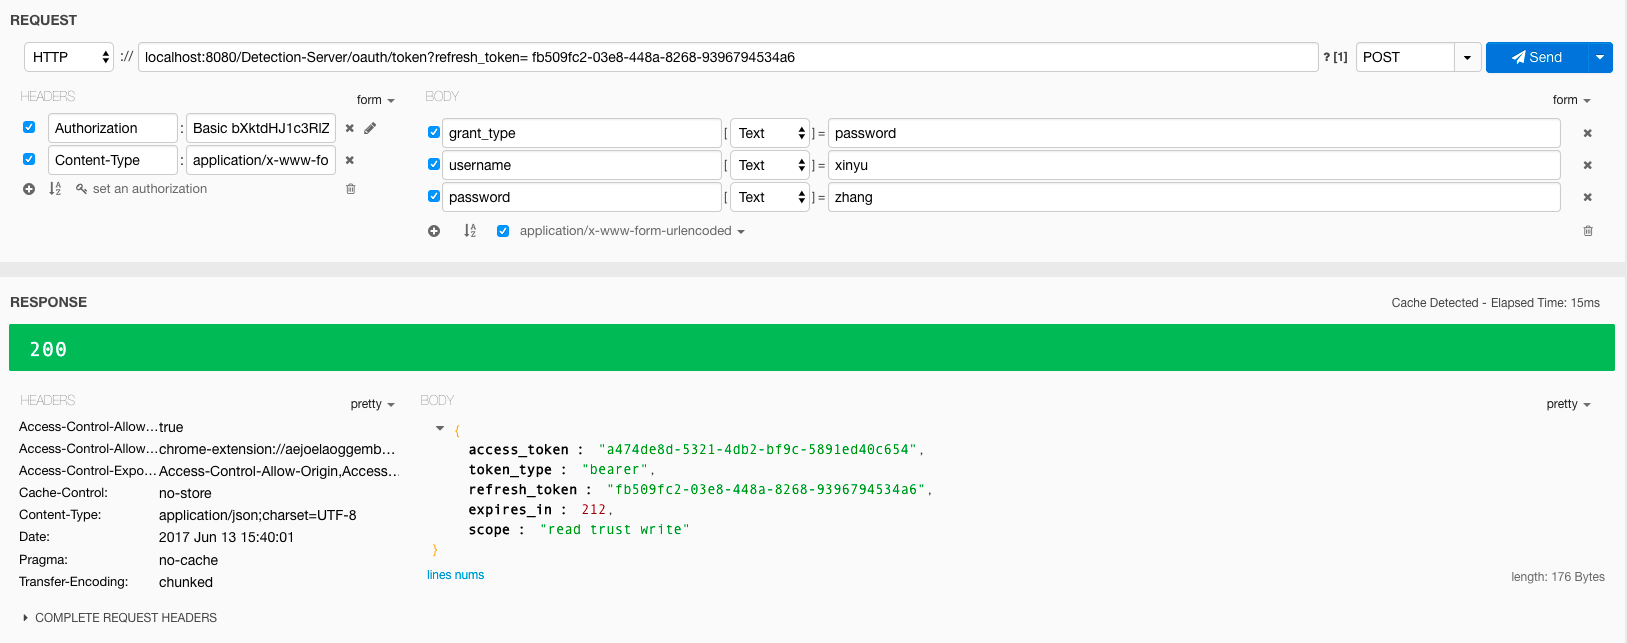
如果上一个请求的access_token已经过期了,就会返回新的access_token:
Alt text

分享
0%